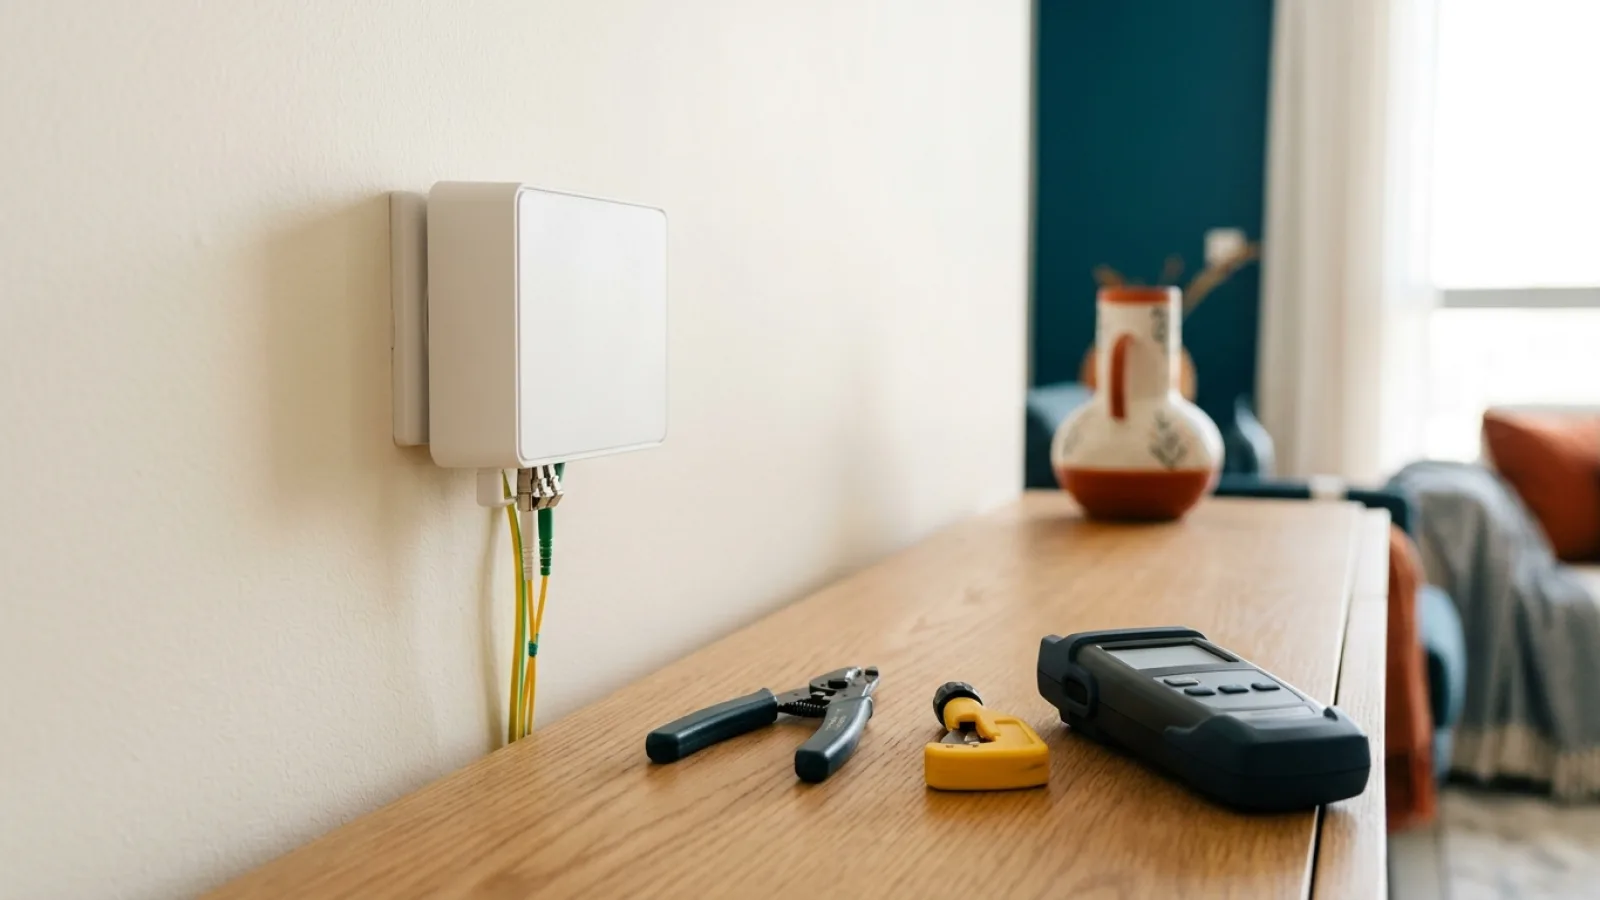

Before you request Fiber, understand the practical steps: address eligibility, plan selection, carrier confirmation and any installation appointment.
Saryan helps you choose a Zain or Mobily Fiber plan and submit a request. Only the carrier confirms service availability and installation timing.
- Coverage and eligibility
- Choosing and understanding the plan
- Preparing order information
- Review and provider handoff
- Appointment communication
- Preparing the home
- Installation day
- Activation and first tests
- Tracking after installation
- Delays and next actions
1. Coverage and eligibility #
Fiber in the neighborhood does not automatically prove that every address or unit is ready. The coverage journey should return an evidence-based state such as available, unavailable, pending verification or insufficient evidence.
2. Choosing and understanding the plan #
Review current price, VAT, promotional period, post-offer pricing where documented, download/upload facts, equipment, commitment, installation fees and eligibility conditions. The customer should understand these before submitting the order.
3. Preparing order information #
Use accurate customer contact information and service address data. Upload only documents that the actual process requires. Sensitive data should never be inserted automatically into WhatsApp messages or casual support channels.
Where legal or commercial acceptance is required, preserve the exact version accepted.
4. Review and provider handoff #
Useful statuses distinguish between received, needs information, under review, handed off, awaiting installation, activated and unable to proceed. A generic “in progress” status is not enough for a trackable customer journey.
5. Appointment communication #
If installation scheduling applies, show whether a date is confirmed, proposed or still awaiting coordination. Never present an estimated date as a guaranteed appointment.
Keep the original order reference and update the existing timeline when dates change.
6. Preparing the home #
Think about router placement before installation. Identify work, gaming and high-use rooms, power availability, large or multi-floor coverage needs, and whether future Mesh/FTTR planning may matter.
7. Installation day #
Field work varies by building and existing infrastructure. The customer can still prepare by being available for access, keeping contact details current, discussing sensible equipment placement and preserving order references.
8. Activation and first tests #
Establish a baseline near the router or over Ethernet where practical before judging performance from a distant room. Then test important rooms and devices. This helps separate access-line issues from Wi-Fi issues.
9. Tracking after installation #
Installation and activation are not necessarily the same state. The customer should know what the current state means, what happens next and where to get help. Support should link back to the existing order context.
10. Delays and next actions #
Delays can come from missing data, location verification, scheduling, site readiness or provider-side processing. Show only documented reasons and ownership. Do not invent service-level promises.
11. Physical Field Engineering: Drop Cable Routing and Electric Arc Fusion Splicing #
Residential optical fiber commissioning entails high-precision physical engineering protocols executed by certified field telecom specialists to deliver coherent laser pulses from street infrastructure to your living room:
A. Outside-Plant Drop Cable Physical Architecture #
- The outside-plant (OSP) drop cable bridges the exterior perimeter wall Fiber Access Terminal (FAT) to the interior living room optical rosette.
- The cable features single-mode silica glass filaments conforming strictly to the ITU-T G.657.A2 bending-insensitive standard, allowing tight turns around interior architectural molding with negligible macro-bending loss.
- Outer jacketing comprises UV-resistant, flame-retardant low-smoke zero-halogen (LSZH) high-density polyethylene reinforced with dual dielectric fiberglass (FRP) structural strength members to resist accidental mechanical tension and desert environmental wear.
B. Precision Electric Arc Fusion Splicing Mechanics #
Inside the exterior FAT enclosure or interior termination rosette, the technician executes microscopic fusion splicing:
- Precision Stripping and Cleaving: The technician strips primary buffer coatings and cleaves the optical fiber utilizing an industrial diamond blade cleaver, ensuring a flat, perpendicular end-face perpendicularity within 0.5 degrees.
- Automated Core Alignment: An electric fusion splicer aligns the two 9-micrometer silica cores (ten times thinner than a human hair) using high-resolution microscopic imaging cameras.
- Controlled Plasma Arc Fusion: The unit generates a high-voltage electric arc that melts and fuses the silica ends into a single continuous optical waveguide with zero air gap.
- Splice Quality and Loss Verification: The splicer automatically performs an optical estimation pass to confirm insertion loss remains under 0.02 to 0.05 dB, protecting the joint with an integrated heat-shrink stainless-steel sleeve.
12. Optical Link Budget Auditing and Formal Speed Verification Handover #
Field commissioning concludes only after rigorous physical layer auditing passes all engineering benchmarks:
A. Received Optical Power Inspection via Optical Power Meter (OPM) #
Prior to inserting the angled physical contact (SC/APC) green optical ferrule into the ONT optical port, the technician connects a calibrated digital Optical Power Meter:
- Optimal Engineering Power Window: Received optical power must measure between -15 dBm and -24 dBm at 1490 nm.
- Mandatory Rejection Threshold: If optical power registers weaker than -27 dBm (e.g., -29 dBm or -33 dBm), carrier commissioning protocols legally prohibit activation, requiring the technician to locate and re-splice high-loss bends or clean contaminated ferrule ends.
B. Direct Wired Cat6 Speed Handover Test #
During technician commissioning, subscribers are entitled to witness an isolated wired line test:
- The technician connects a diagnostic workstation directly to GE1 on the optical ONT via a verified Cat6 Ethernet patch cord.
- Speed tests executed against local national internet exchange servers (SAIX in Riyadh, JEDIX in Jeddah) must verify 95% to 100% of nominal advertised plan download and upload speeds with round-trip latencies below 6 to 12 milliseconds.
13. Digital Customer Authentication and Identity Verification Protocol #
To prevent fraudulent activations and safeguard subscriber contractual rights, the CST mandates strict two-factor electronic authentication:
- Direct SMS OTP Authorization: Upon completing physical splicing and verified line testing, the carrier core billing platform generates an automated verification code dispatched to the subscriber mobile phone registered in the national Absher directory.
- Reviewing Contract Summary Details: Before sharing the OTP with the technician, carefully inspect the SMS payload: verify carrier brand identity (Zain or Mobily), nominal speed tier, and monthly tariff match the exact terms quoted during your SARYAN order.
- Executing Formal Acceptance: Entering the OTP into the technician mobile dispatch terminal constitutes your formal legal acceptance of service handover. Never surrender the OTP if the optical line is offline or failing performance benchmarks.
14. Post-Installation Engineering Health Checklist: First 48 Hours #
To ensure long-term network stability following technician departure, execute this six-point verification routine:
- Inspect ONT Status Telemetry: Verify that the PON status LED glows solid green with zero flickering, and confirm the LOS (Loss of Signal) indicator remains completely unlit.
- Harden Gateway Administration Credentials: Access the web management portal (192.168.1.1 or 192.168.100.1) and immediately replace the factory administration password.
- Implement WPA3-Personal Wireless Security: Configure state-of-the-art encryption across domestic wireless bands.
- Band Decoupling (2.4 GHz vs 5 GHz): If managing older smart home appliances, establish a dedicated 2.4 GHz SSID for IoT clients, reserving the 5 GHz/6 GHz 80/160 MHz spectrum for laptops, gaming rigs, and 4K displays.
- Map Household Coverage Density: Identify perimeter rooms experiencing RF attenuation to plan potential Cat6 Ethernet backhaul or mesh access point additions.
- Archive Support Coordinates: Save SARYAN sales & customer assistance contact (0596453545) and your unified order reference code for future follow-up.
15. In-Building Structural Pathways: Low-Current Conduits and Aesthetic Surface Solutions #
Technicians routinely navigate architectural and civil routing complexities when delivering optical drop lines into domestic living spaces across Saudi properties. Applying standard structured cabling best practices ensures a clean, damage-free installation:
A. Routing Through Dedicated Low-Current Conduits #
- Modern Saudi villas feature dedicated 20 mm to 25 mm rigid PVC in-wall conduits linking exterior low-current pull boxes to central interior telecom cabinets.
- The installation crew utilizes an industrial flexible nylon fish tape to pull the G.657.A2 drop cable through internal bends, applying water-based cable lubricants if friction rises.
- Mandatory Safety Protocol: Carrier regulations strictly prohibit sharing conduits with high-voltage AC electrical mains wiring (220V/380V) to prevent electrical hazard induction and avoid mechanical abrasion against heavy copper wires.
B. Aesthetic Contingencies for Obstructed or Absent In-Wall Pathways #
In properties where internal conduits are crushed, blocked by construction mortar, or entirely absent:
- Color-Matched Decorative Surface Trunks: Technicians mount slim, impact-resistant PVC profile channels along the upper edge of floor baseboards, enclosing the optical jumper in a clean casing that integrates seamlessly with interior architectural finishes.
- Invisible Micro-Optical Cable Bonding: The cutting-edge architectural standard: routing an ultra-thin (0.9 mm), completely transparent silica micro-cable bonded along wall moldings with rapid-curing translucent adhesive, providing zero visual footprint across luxury living rooms and gypsum installations.
C. Optimal Elevation and Demarcation for the Terminal Rosette #
- Instruct the technician to install the optical wall rosette at an elevated position (at least one meter above finished floor level) adjacent to a dedicated grounded 220V power receptacle. Avoid cramped floor-level alcoves behind heavy furniture or high-humidity zones to safeguard sensitive optical transceivers and ensure maximum hardware service life.
Optical Power Standards and Signal Verification #
During the physical activation handover, the field technician must measure and record the received optical power using an optical power meter calibrated for GPON wavelengths (1490 nm downstream, 1310 nm upstream). Regulatory and manufacturer specifications require the optical signal at the Optical Network Terminal (ONT) optical SC/APC port to rest between -15 dBm and -25 dBm. A signal weaker than -27 dBm indicates excessive optical attenuation, macro-bending in the internal conduits, or micro-fractures in the fusion splice, which will result in intermittent disconnections and packet drops. Always request confirmation from the technician that the optical power level is comfortably within the optimal operating range before signing the electronic installation receipt.
Conclusion #
A good Fiber installation experience is built on clarity rather than optimistic promises: verified coverage, understood plan terms, complete order data, meaningful statuses, documented scheduling and a sensible first-test process.
Internal links #
/fiber · /coverage · /how-it-works · /track-order · /support · K05 · K11 · K12
Editorial source review #
Service-specific installation details must be checked against current governed authorized carrier/broadband advisory desk operational evidence before publication. Keep generic process guidance separate from provider-specific commitments.
From Eligibility to Activation: What Actually Happens? #
The Fiber journey does not start with the technician visit; it starts with address qualification. Seeing a plan in a catalog does not mean a specific building is ready for installation. An area can have Fiber infrastructure while a particular building needs more verification, or the submitted address may be incomplete. Keep “plan exists,” “address qualifies” and “request accepted for execution” as separate states.
After selecting a plan, review request details carefully: mobile number, district, building type and any location reference required by the workflow. A small address error can route the request into a different review path. Do not provide sensitive information that the process does not require, and keep the request or reference number because it is the practical key for later follow-up.
A scheduled visit is not an automatic promise that installation will finish during that appointment. The technician may need to verify the cable route, entry point, available port or shared-building infrastructure. Some buildings have straightforward paths while others expose restrictions that require extra handling. Preparing the site reduces surprises, but it cannot override the actual physical infrastructure.
Choose the ONT and router location before the visit. The nearest point to the door is not always the best position for the home network. A more central, elevated position away from large metal objects can improve Wi-Fi. In a large home, consider Ethernet, access points or mesh from the start rather than placing everything in a poor location and trying to repair coverage later.
During final testing, do not rely only on a phone connected through Wi-Fi. When possible, test a wired device to verify the base connection, then test wireless performance in the rooms that matter. Record the network name, router location, any additional equipment and approximate results. That information becomes a useful baseline if a problem appears later.
After activation, separate line problems from home-network problems. If performance is good next to the router or over Ethernet but poor in one room, Wi-Fi distribution is the likely focus. If performance is poor even on a wired device at multiple times, the troubleshooting path changes. This distinction saves time and prevents unnecessary plan or hardware changes.
In rented buildings, check whether the cable route needs landlord or building-management approval. Do not assume drilling or permanent mounting is automatically permitted. In villas, think about the Fiber entry route and equipment position before the appointment. A small amount of planning can prevent a placement decision that compromises whole-home coverage for years.
A healthy journey can be summarized as: qualify the address, choose the plan, register the request, prepare the site, complete the visit, test the connection and then observe real usage. Each stage answers a different question, so “coverage confirmed” should never be used as a substitute for the full process. SARYAN keeps these boundaries explicit to reduce unrealistic activation promises.
| Decision field | Practical question | What to record |
|---|---|---|
| Usage | What happens at peak time? | Simultaneous devices and workloads |
| Measurement | Is the result consistent? | Download, upload, latency and notes |
| Coverage | Does the address qualify? | State, date and source context |
| Cost | What is the full cost? | VAT, equipment, commitment, promo expiry |
| Home network | Is the bottleneck inside the home? | Wired vs Wi-Fi and router position |
What should be documented at each stage? #
Keep a simple record of the coverage-check date, selected plan, request reference, appointment when one exists, and what actually happened during the visit. If execution is delayed, record the stated reason and next action. Fiber fulfillment can pass through several teams or states, so a clear reference trail is more useful than reconstructing the story every time support is contacted.
After activation, compare the first bill or contractual summary with the facts used when ordering: price, VAT, commitment and equipment. If a temporary promotion applies, save its end date and following price. This is not about expecting a problem; it makes the service auditable so you can quickly distinguish promotion expiry, a changed term or an issue that genuinely needs follow-up.
Before you consider the request complete #
After activation, confirm three things: the service works, the recorded plan matches what was requested, and equipment placement is practical for daily use. Keep the request reference, appointment details and plan name. This simple record makes later follow-up easier, especially if a billing difference or in-home Wi-Fi problem appears after installation.
Keep the request reference through the first billing cycle; a simple record of the order, installation and selected plan makes any later review faster and more precise.